With a stand-alone survey, you generate a link that you can share with your customers or users via email, as a CTA, or otherwise.
You have the same question types and options available for stand-alone surveys, onsite surveys, and embedded surveys.
The question types are:
- Single Select
- Short Free Text
- Rating Scale
- Multi Select
- Long Free Text
- Net Promoter Score
- Ranking
- Mailing
- Matrix
- Emoji
You can use multiple survey types within one survey.
Would you like to learn more about the question types?
With a stand-alone survey, you cannot set targeting options. Instead, you will find the link to the survey in the Target tab at the top left. You can copy the link and insert it anywhere.
Every survey begins with an engagement trigger (a welcome message) and ends with a thank you message. We have already prepared both messages for you.
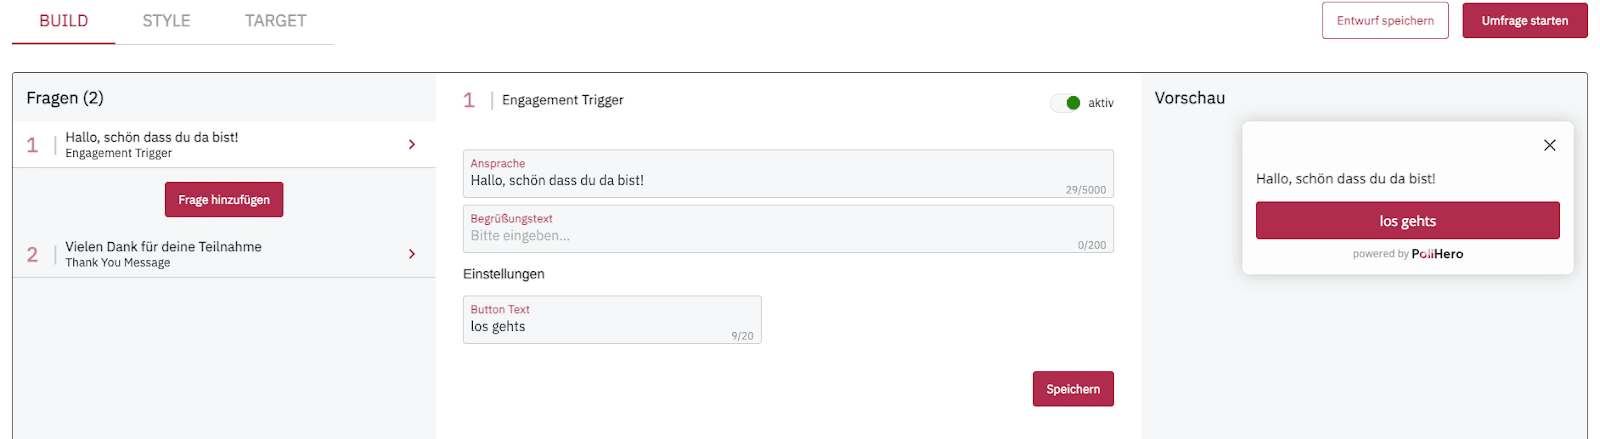
You can customize the text of the engagement trigger and the thank you message or deactivate both messages. This allows you to start directly with a question or not display a thank you message.
On the right side of the screen, you can see directly what your message or question looks like. You can change the design in the Style section.
Read more about this here: Survey Design
Step 1: Add Question #
Between the engagement trigger and the thank you message on the left side of the screen is the Add Question button. Clicking the button opens the overlay with the question types.
Would you like to learn more about the question types?
Within a survey, you can use multiple question types. You can also change the order of the questions by grabbing a question and dragging it to another position in the questionnaire using drag & drop.
You cannot change the order of the welcome message and the thank you message.
You can create multiple thank you screens and change the order of the thank you messages among themselves. Additional thank you messages can be found in the question types tab.

Depending on how complex your survey is, different thank you messages are a good idea, as users may drop off at different points in your survey. It may also make sense to display a different message to users who give you positive feedback than to users who give you negative feedback.
Step 2: Edit Question #
Each question type has a question that you can edit. Your question should match the question type. Yes/no questions work well for single select questions, questions about your customers’ opinions can work well as free text questions.
You can set whether a question is a required question. For required questions, you can write a custom error message or use our standard wording. The error message is displayed when participants click “next” without having answered the required question.
If a question is not a required question, participants can skip it. You can customize the text of the skip button.
You can add an optional description. For example, with multi select questions, you can specify how many answers can be selected. Or you can explain your question in more detail, provide examples for free text answers, etc.
For some question types, you can set whether the answers are displayed in random order, in the entered order, or whether everything except the first or last answer is displayed randomly.
For example, if you ask a multi select question with brands as answer options, it can be helpful to sort the brands alphabetically or place your biggest competitors at the end.
Step 3: Add Rules #
This step is optional. It can help you better understand your customers’ responses in more complex surveys.
Rules follow an if/then logic that differs for each question type. You can combine multiple rules; they follow an OR logic.
For example, you can ask customers who gave you a poor rating to explain their rating in more detail. Or you can ask answer-based follow-up questions for yes/no questions.
A detailed explanation of all rules can be found in the article Add Rules.
Start Survey #
You can easily publish your survey. In the survey draft, you will see the red “Start Survey” button in the upper right corner. Click here to publish your survey. It will appear on your page immediately. In the case of a stand-alone survey, you can share the link immediately.
End Survey #
Click on the three dots next to the “View Results” button. Then click on “Edit Survey”. In the upper right corner, you will see the green “Survey Active” button. Click here to pause or end the survey. Once the survey is ended, you cannot publish it again.
Continue with the Survey Reporting
Learn more about creating the different survey types: